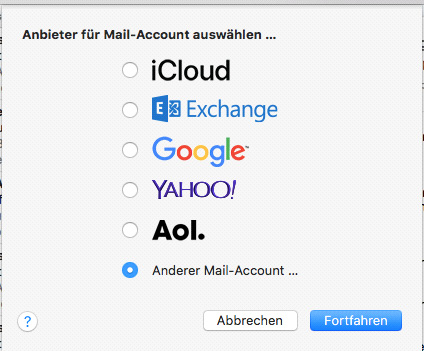
Integration of a shared mailbox under Apple Mail
Important:
To access a shared mailbox, the owner must have authorisation (full access and/or sending authorisation) via PRISMA. In the following example, the address max.muster@uni-bielefeld.de has authorisation for the shared mailbox funktionspostfach@uni-bielefeld.de.
3.
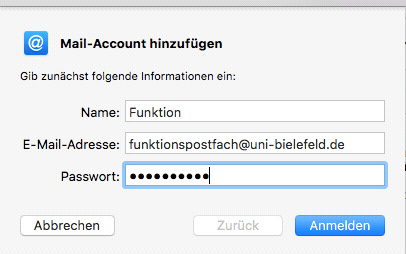
Enter the following data.
Name:
-> Sending name of the shared mailbox (as it should appear when sending an email to recipients)
Email address:
-> email address of the shared mailbox
Password:
-> BITS password of the personal mailbox(!)
Then click on Registration.
4.
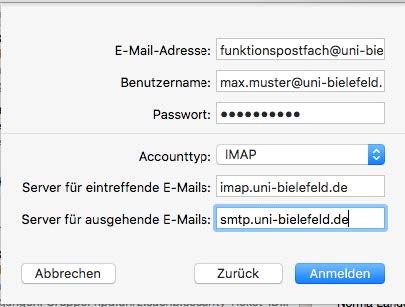
Additional information must be entered in this window.
User name:
Email address of the personal mailbox, "slash", part of the email address of the shared mailbox BEFORE the @ sign. Example:
-> max.muster@uni-bielefeld.de/funktionspostfach
Account type:
-> IMAP
Server for incoming emails:
-> imap.uni-bielefeld.de
Server for outgoing emails:
-> smtp.uni-bielefeld.de
Then click on Registration .
If the message "Account name/password could not be verified" is displayed, click on Registration/Continue again. This may be related to the settings for the outgoing mail server (see Sending emails).
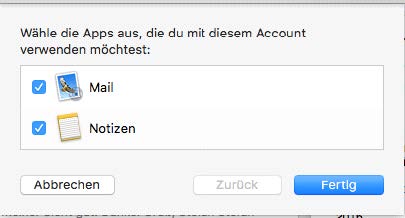
6.
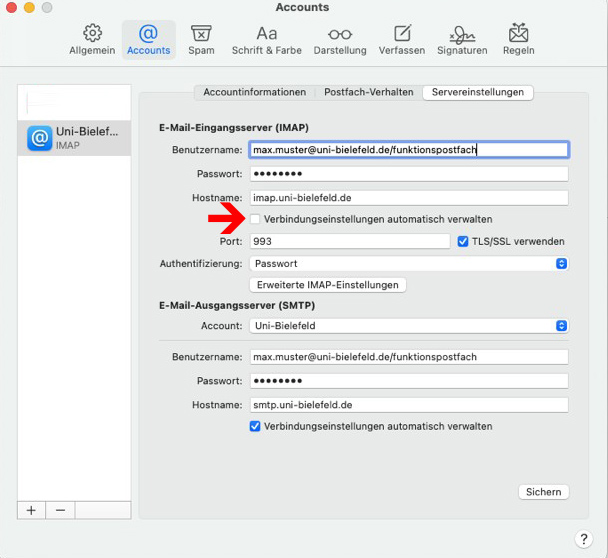
To ensure that the mailbox is loaded and registration is successful, open "Mail > Settings ..." in the programme.
Remove the tick next to Automatically manage connection settings and then click on Save .
Note: Sending emails
If emails are also to be sent via the shared mailbox and a sending authorisation has been assigned in advance, further settings must be made. See the following instructions.
Send email
1.

Open "Mail > Settings ..." in the programme. Select the shared mailbox under Accounts and switch to the Server settings tab.
2.

Three changes need to be made:
- In the field User name from outgoing email server (SMTP), the part of the email address of the shared mailbox must be removed again. As shown in the picture.
- Remove the tick from Manage connection settings automatically.
- Setauthentication to password .
The changes are saved via Save .